Product launches / Photos and crops
Make a product launch with your own photo
Start from a ceramics template, replace its photograph, and make a launch post and story that describe your product. The example below uses fictional sample imagery to show the controls; it is not a real merchant campaign.
1. Choose the starter that fits your message
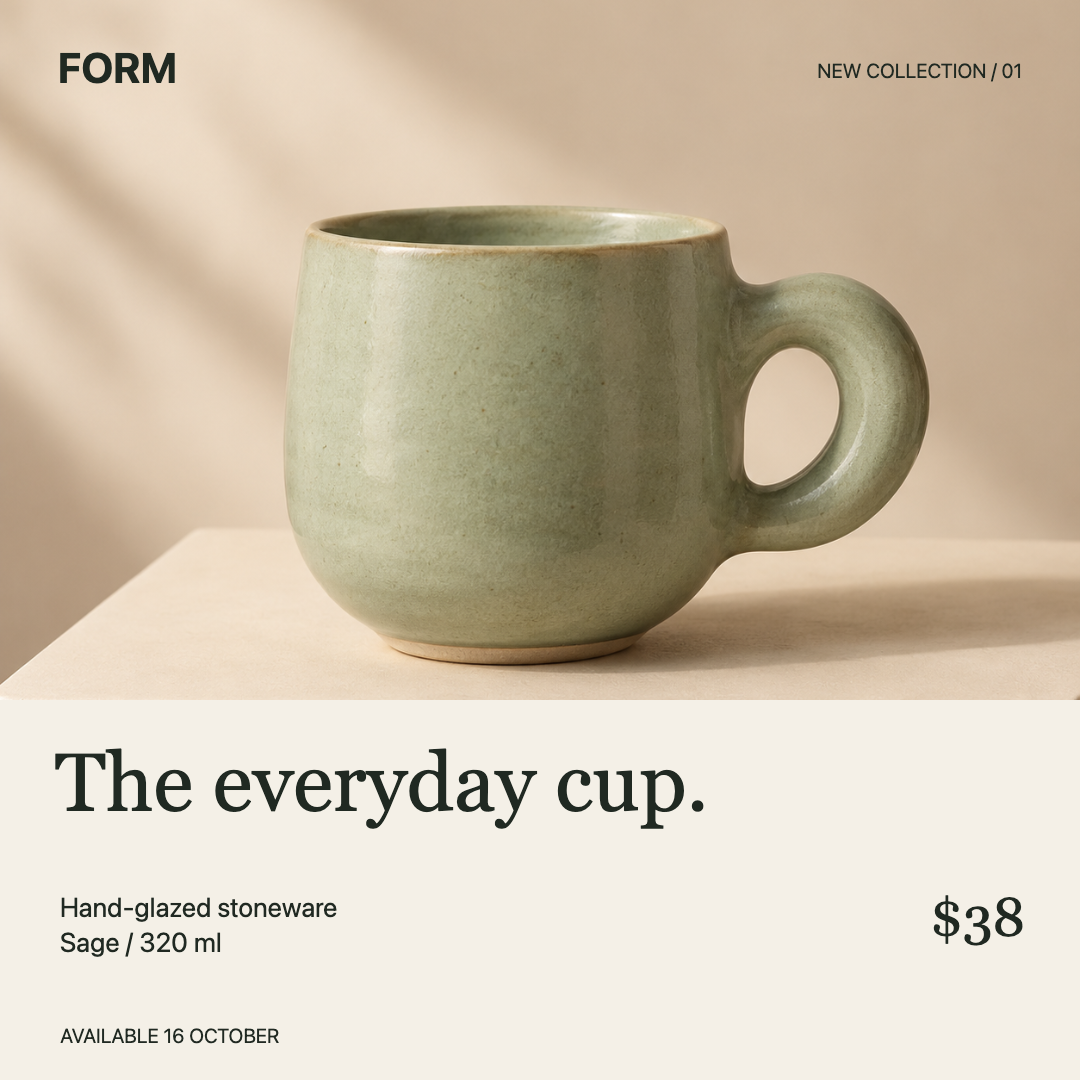
FORM Stoneware Launch puts a full-width product photo alongside a price, material description, and release date. Choose it for a specific product announcement.
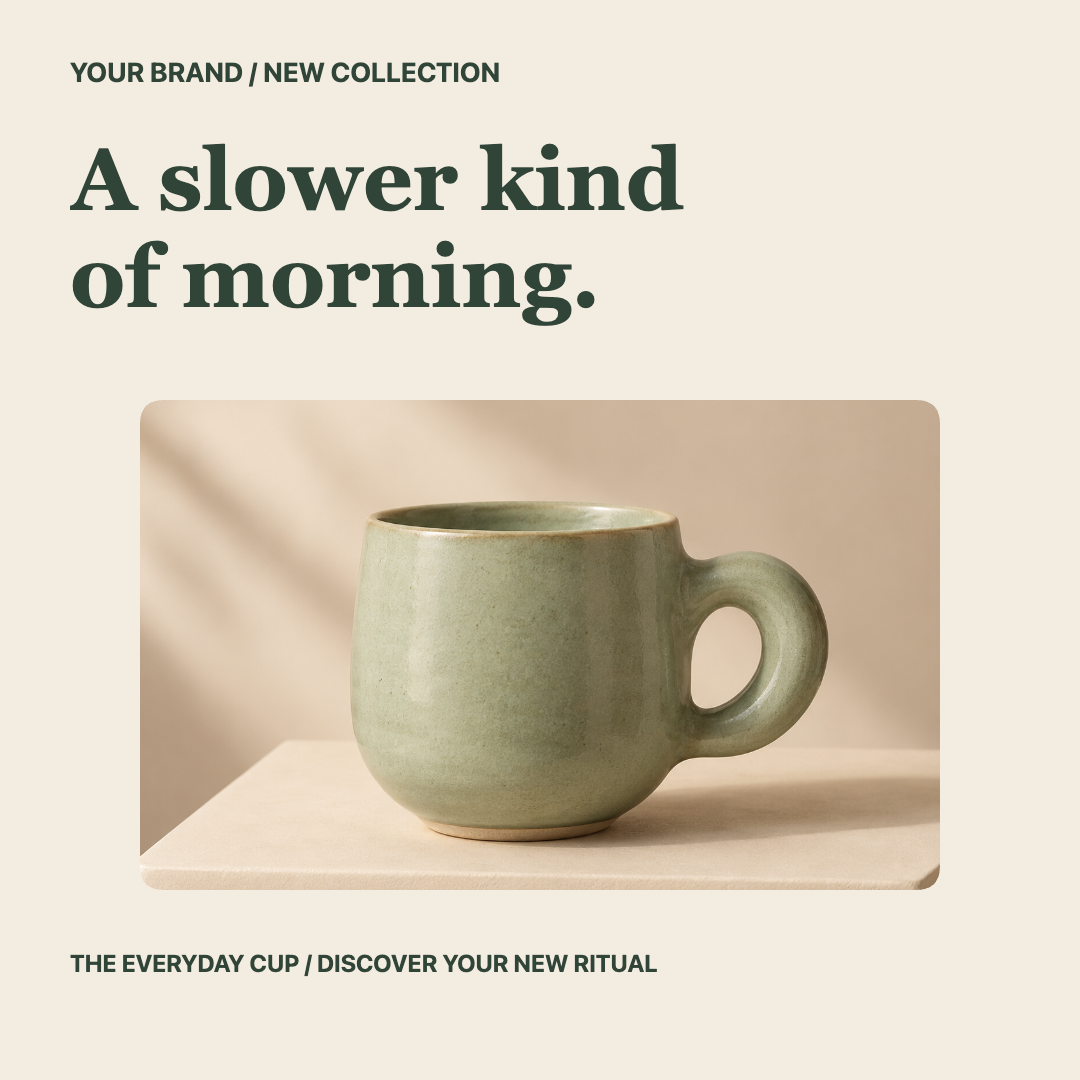
Morning Ritual Launch leads with “A slower kind of morning.” and a framed cup photograph. Choose it for a short lifestyle message rather than a detailed offer.
Both starters contain independently editable 1080 × 1080 and 1080 × 1920 artboards. When opening either, keep or save any existing local draft before explicitly replacing it. Our demonstration uses FORM.
2. Replace the product photograph
In Layers, select Sage cup / replace with your product. Open Object and choose Replace image, then select your own local PNG, JPEG, or WebP, up to 10 MiB. Artboar keeps the layer's position, size, and styling. A replacement may need a different crop.
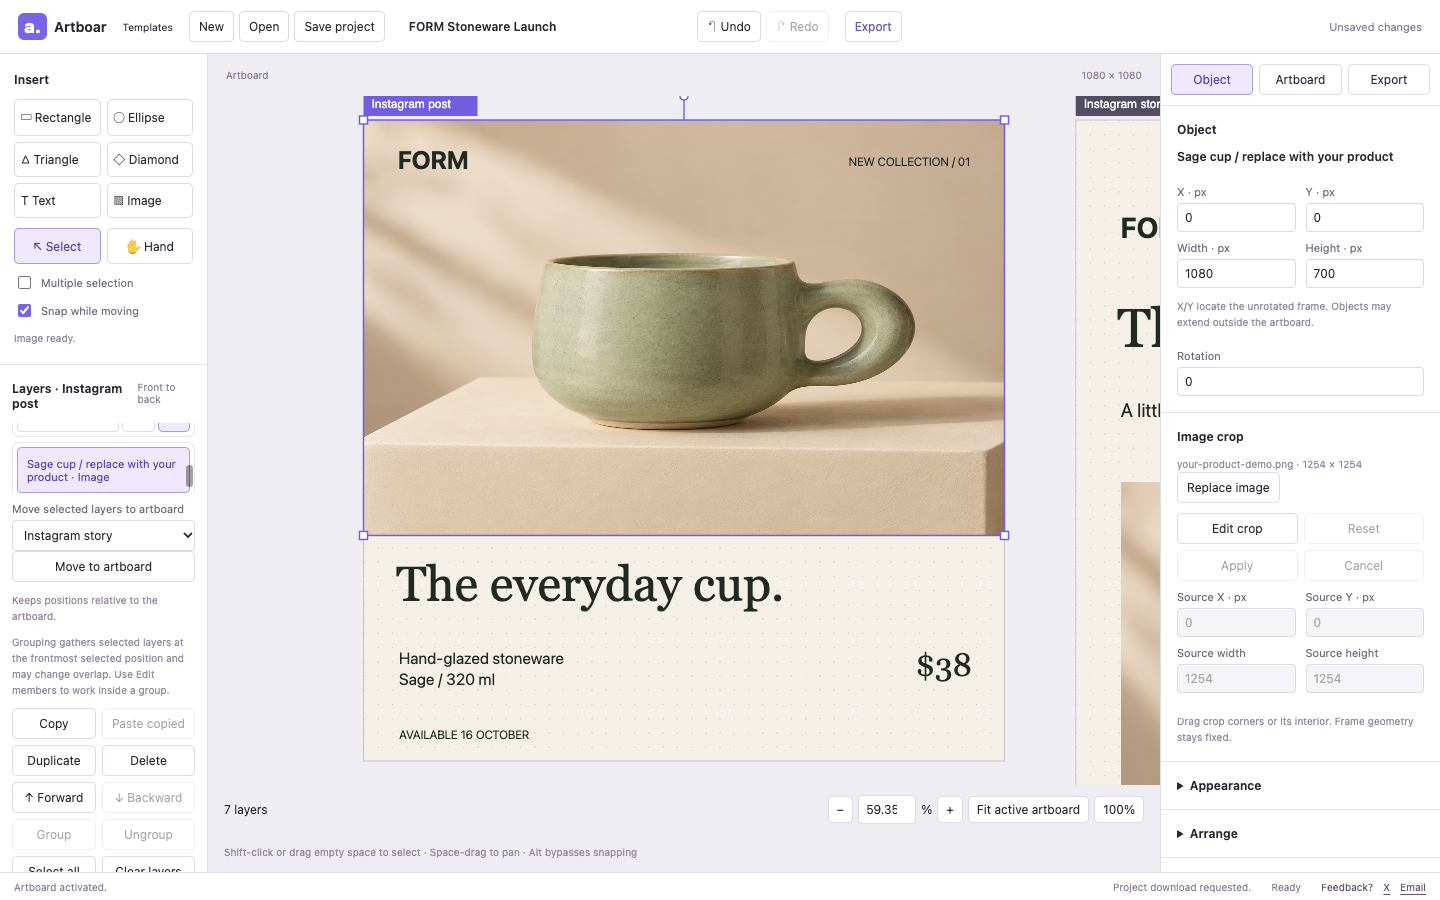
This capture uses the bundled AI-generated cup photo as the replacement demonstration. Use your own product photo for a real launch.
In Morning Ritual, select Product photo instead. Its rounded frame stays in place when you replace the image. The FORM demonstration reselects the same bundled cup source to show the replacement controls; the changed crop below is the visible difference.
3. Compose the crop for the frame
Choose Edit crop. Frame the product clearly without cutting off a handle or the feature your caption describes. Drag the crop handles or use the Source X, Source Y, Source width, and Source height fields. Choose Apply; Cancel discards the current adjustment.
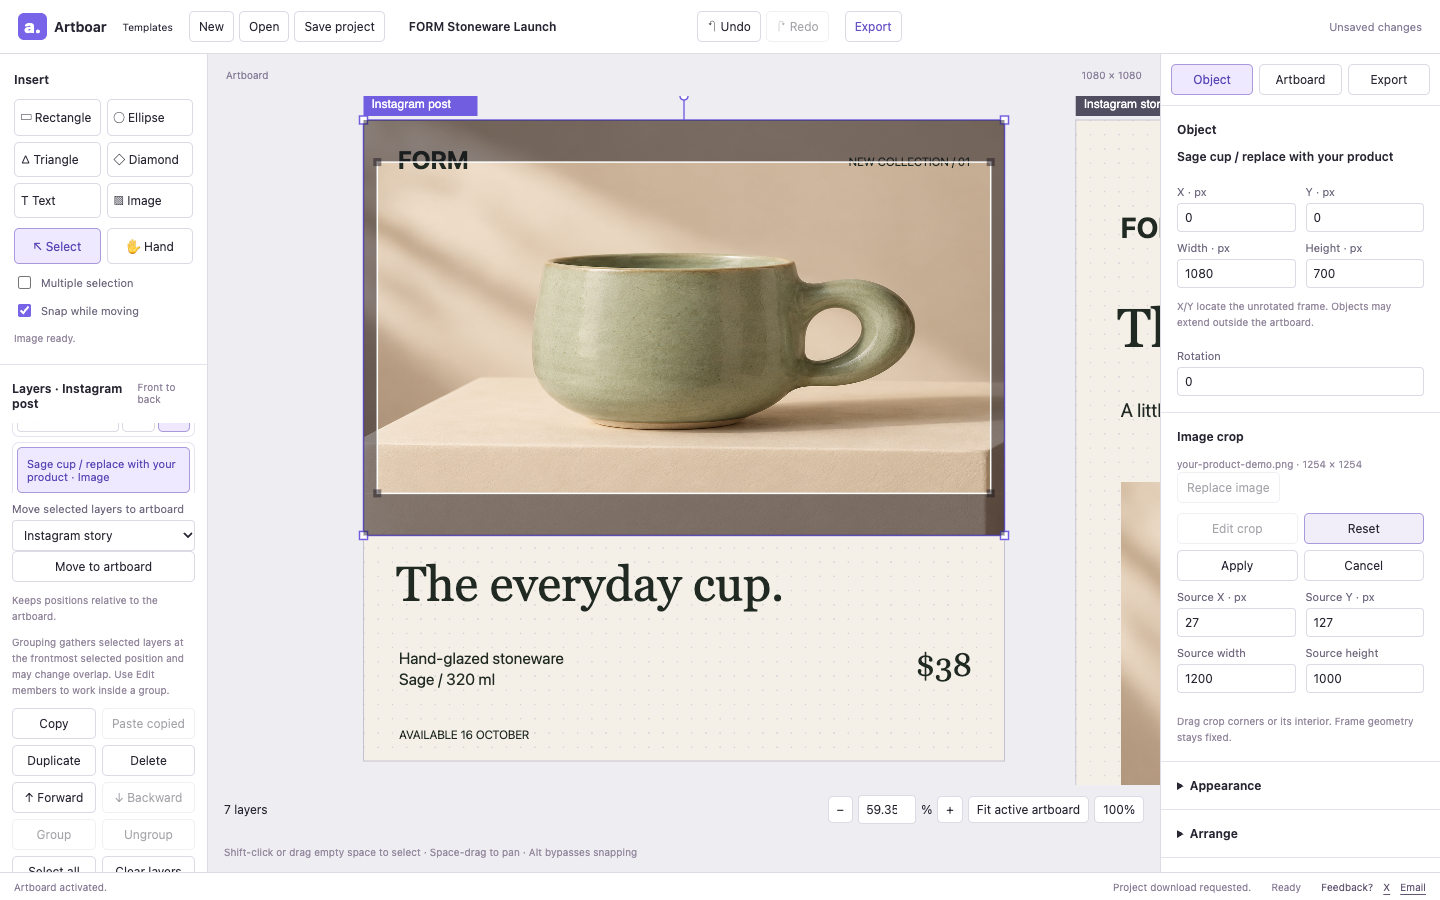
Check the visible product in the canvas before applying the crop. A tall story may need a different crop from the post.
4. Replace every sample claim
For FORM, edit Brand, Collection, Headline, Material, Price, and Release in Layers → Object → Content. Replace the fictional price and date with your actual details; remove a claim you cannot substantiate. Our demonstration changes the headline to “Your next daily ritual.” while retaining fictional sample details for illustration.
For Morning Ritual, edit Edition, Headline, and Footer on each artboard, plus Description on the story. Keep the headline short enough for its frame. If you change fonts, check line breaks: the templates use system fonts; Inter, Lora, and JetBrains Mono are also included in Artboar.
5. Adapt the story and export both layouts
Choose Instagram story in Artboard and Fit active artboard. Replace its image and edit its wording too. Changing the square post does not update the story; resizing a board does not rearrange its objects.
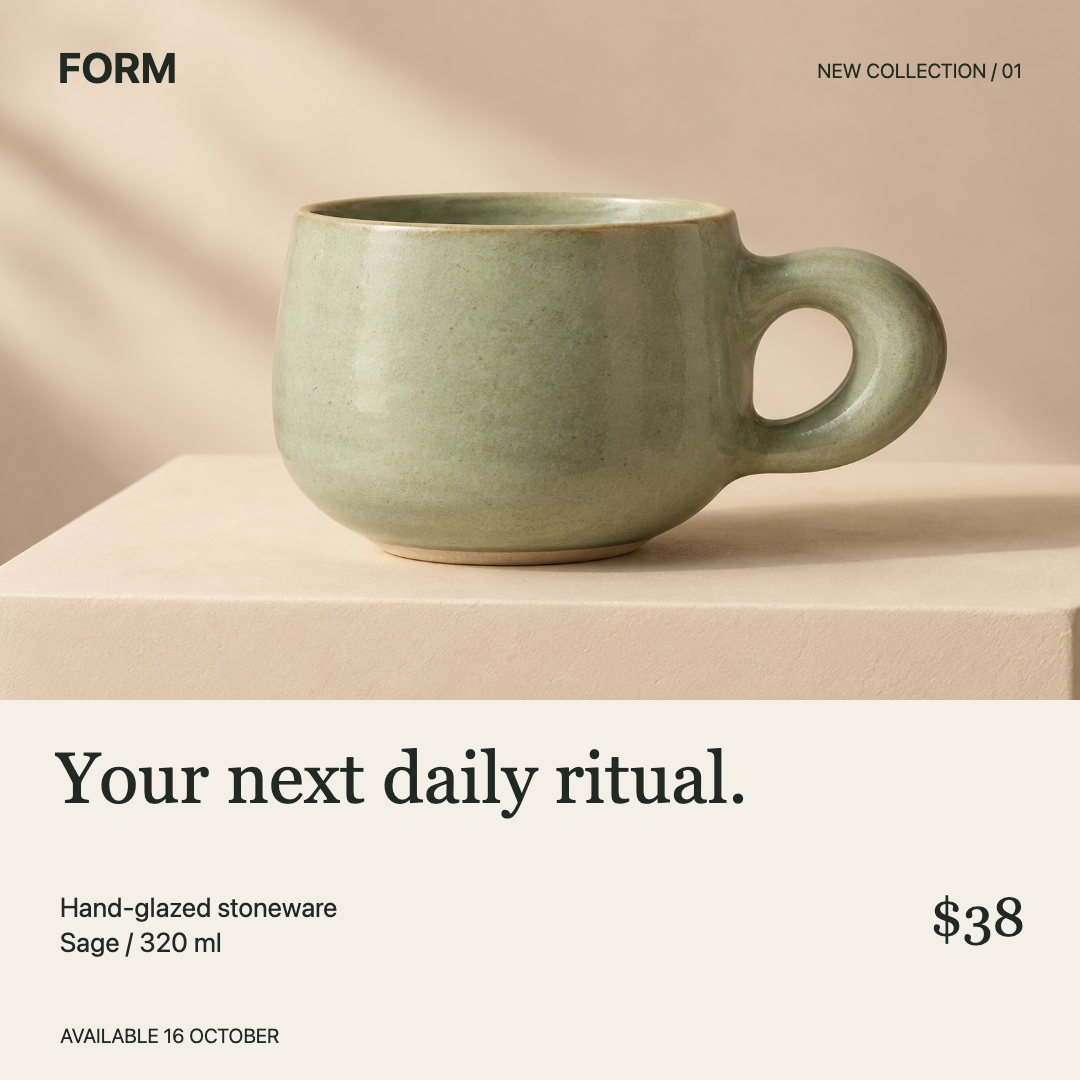
Post demonstration. The sample product details remain fictional.
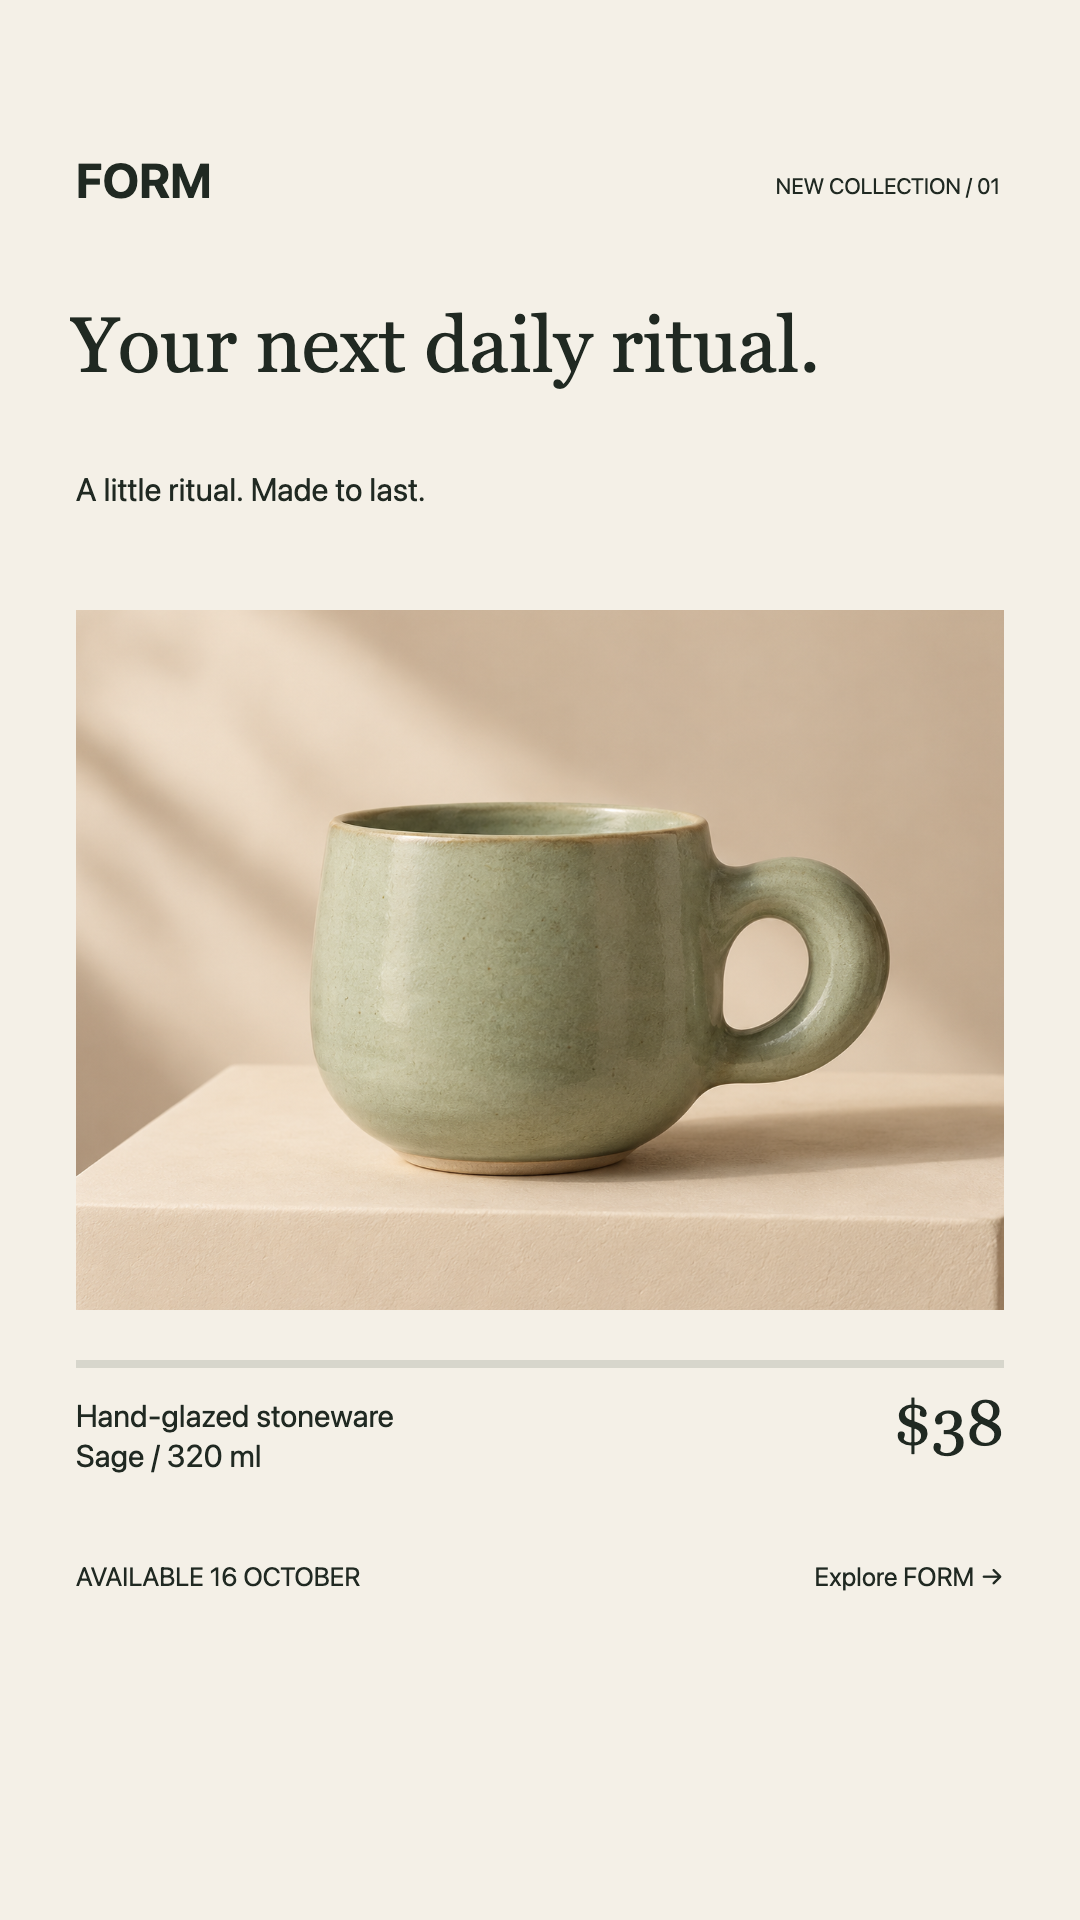
Story demonstration. Its composition and crop are checked separately.
In Export, choose PNG at 1× and Export image for each artboard. Inspect both downloaded images at the size your audience will see. Preview the story in the destination app too, where interface controls can cover its top and bottom.
Use Save project to keep both layouts editable in a downloaded .design.json file. Local recovery can resume one draft in this browser, but it is not a portable backup.
Use FORM Stoneware Launch · Use Morning Ritual Launch · Browse Instagram templates
For a full workshop example, see make a social post and matching story. For another format, try the small-size thumbnail check.